
Showing posts with label Candles- Holiday. Show all posts
Showing posts with label Candles- Holiday. Show all posts
Monday, December 29, 2014
Snowball Candle Tutorial

Tuesday, December 21, 2010
Peppermint Cocoa Candle
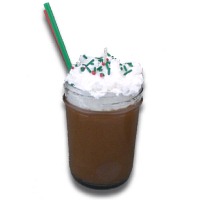
Make sure to check out Wholesale Supplies Plus' Blog and Website for more creative soap and candle making ideas.
The Ingredients you need for this project are 1 lb. IGI 4633,
1 oz Peppermint Cocoa FO ,/4 #23 Mohogany Candle Color Block, 8 oz Smooth Jelly Jar, 1 Low Smoke Zinc Wick #23, Candy Sprinkles and Lollipop Candy Sticks. All ingredients can be purchased through Wholesale Supplies Website.
To complete this project you will also need the following utensils: Wax Melting Pot, Wax Mixing Bowl, Spoon, Candy Thermometer, Measuring Cup, Hand Mixer, Hot Glue Gun, Drinking Straw
and 70 mm Wick Holder.
For full directions on how to make this project, visit Peppermint Cocoa Candle link through Wholesale Supplies Plus Blog.
Thursday, September 30, 2010
Specimen Jar Candle for Halloween

When I saw this project on Martha's website, it brought back memorie of my high school biology class. And it looks like it would be somewhat easy to create. But give yourself plenty of time to make it for your next Halloween event.
Friday, September 10, 2010
Candy Corn Candles Recipe

Materials
8 oz. gel candle medium
Small clean mason jar
½ cup candy corn (Plastic novelty eyeballs or wiggly eyes can also be used for a fun look)
Black and Orange Spool-o-ribbon
Instructions
1.Melt candle gel in a large microwaveable dish at 30 second intervals until completely melted.
2.Slowly pour melted wax into mold. Allow to set for 1 minute.
3.Push candy corn or eyeballs into candle using a chopstick or skewer.
4.Refill mold to fill in holes.
5.Tie Black and Orange ribbon around base of candle.
Source: http://www.pureandnaturalsoaps.com/recipe-candycorncandles.html
Saturday, March 27, 2010
April Fool's Gold Soap from the Soap Queen

Monday, March 15, 2010
Learn to Make a St. Patrick's Day Green Beer Candle

http://candleandsoap.about.com/od/holidayprojects/ht/greenbeercandle.htm
Wednesday, December 23, 2009
Scented Soy Votive Candles by Martha Stewart
 Tools and Materials
 Soy wax (#112138), Yaley Candle, yaley.com
Votive glasses, from Ikea
Wax color chips
Essential oils (for 3 cups of wax, you'll need 40 drops), 1 oz. each, Majestic Mountain Sage, thesage.com
Small pipettes, (#108-2401), Majestic Mountain Sage, thesage.com
Small braided wick, (12R, #120473), Yaley Candle, yaley.com
Metal wick clips, (#110517), 15 mm, Yaley Candle, yaley.com
Small wooden skewers
Funnel
Clip-art labels and partition templates
Optional: Crystal Clear Pop & Lock boxes, (PLB138), from clearbags.com

To determine the quantity of soy wax you will need, fill votive glass with water and measure that volume. Melt wax in a microwave, following package instructions. Add wax color chips, stirring to melt and blend, until desired color is achieved. For scent, add essential oils to wax (for 3 cups of wax, you'll need about 40 drops); stir to blend.
Step 2
Set the wick in place: Thread a length of braided wick through a metal wick tab, then "glue" it to the bottom of the glass with a dab of melted wax. Tie wick to a skewer resting atop the glass, so it stays taut and centered. Using a funnel, pour wax into each glass, running the wax over the wick to coat it. Let wax dry and harden thoroughly. If surface dips, fill in with extra wax. Trim the wick to 1/4 inch.
Step 3
http://images.marthastewart.com/images/content/web/pdfs/2009Q4/msl_1209_candle_labels.pdf
Source: http://www.marthastewart.com/how-to/scented-soy-votive-candles#slide_0
Subscribe to:
Posts (Atom)
